前言
日常开发中,接口文档是至关重要的,规范、清晰明了的接口文档更是能让人赏心悦目。虽然说接口文档是比较开放的看开发人员心情的,在哪写,怎么写都可以,只要项目成员之间看得懂就行了,但还是有必要建立一套规范,来说明接口文档应该如何写。
规范
Swagger是一个用于描述RESTful API的规范和工具集合,它以yaml或者json格式来描述接口的结构,方便机器读取:
1
2
3
4
5
6
7
8
9
10
11
12
13
14
15
16
17
18
19
20
21
| swagger: "2.0"
info:
title: Sample API
description: API description in Markdown.
version: 1.0.0
host: api.example.com
basePath: /v1
schemes:
- https
paths:
/users:
get:
summary: Returns a list of users.
description: Optional extended description in Markdown.
produces:
- application/json
responses:
200:
description: OK
|
基于这个结构,Swagger中的一个工具swagger-ui就可以生成一个可交互的接口文档,是一个HTML页面,可以在浏览器中访问:
Swagger规范(Swagger Specification)在2015年左右逐渐演变成了OpenAPI规范(OpenAPI Specification),这一转变进一步推动了API开放行业的发展。OpenAPI是Linux基金会的一个项目,Linux选择OpenAPI作为API的标准描述语言,让OpenAPI(Swagger)规范得到了广泛的接受,成为了事实上的行业标准。
随着OpenAPI 3.0版本的发布,OpenAPI规范更加注重规范本身,而不关心具体实现的工具,所以与之对应的Swagger 3被视作为基于OpenAPI 3.0规范实现的一个工具集,之前版本的Swagger 2被称为Swagger 2或者OpenAPI 2.0规范。如今,OpenAPI已经成为了描述RESTful API的标准规范,而Swagger则更多地被看作是实现这一规范的工具集。
OpenAPI 3.0 Specification的结构如下:
1
2
3
4
5
6
7
8
9
10
11
12
13
14
15
16
17
18
19
20
21
22
23
24
25
26
| openapi: 3.0.0
info:
title: Sample API
description: Optional multiline or single-line description in [CommonMark](http://commonmark.org/help/) or HTML.
version: 0.1.9
servers:
- url: http://api.example.com/v1
description: Optional server description, e.g. Main (production) server
- url: http://staging-api.example.com
description: Optional server description, e.g. Internal staging server for testing
paths:
/users:
get:
summary: Returns a list of users.
description: Optional extended description in CommonMark or HTML.
responses:
'200':
description: A JSON array of user names
content:
application/json:
schema:
type: array
items:
type: string
|
也是可以用yaml或者json格式来编写。
我们可以手写这样一份规范文件,然后再用Swagger工具来生成接口文档,但这显然工作量有点大,查OpenAPI的规范文档也让人头大。事实上,这可以通过在项目代码中使用注解来标记接口,让框架解析并自动生成,下面会介绍。
SpringBoot集成springdoc-openapi
springdoc-openapi是一个可以将SpringBoot和SwaggerUI集成到一起的库。SpringBoot 2.x版本可以引入springdoc-openapi v1的版本,如下:
1
2
3
4
5
| <dependency>
<groupId>org.springdoc</groupId>
<artifactId>springdoc-openapi-ui</artifactId>
<version>1.8.0</version>
</dependency>
|
引入之后就可以直接访问接口文档了,SwaggerUI生成的接口文档默认地址是:http://localhost:8080/swagger-ui.html,生成的OpenAPI Specification可以通过http://localhost:8080/v3/api-docs访问。
下面是一些基本配置:
1
2
3
4
5
6
7
8
9
10
11
12
13
14
15
16
| springdoc:
swagger-ui:
path: /swagger-ui-custom.html
api-docs:
path: /v3/api-docs
group-configs:
- group: module1
pathsToMatch:
- /api/**
- group: module2
pathsToMatch:
- /**
pathsToExclude:
- /api/**
|
详细的配置可以编写一个配置类,对接口文档的基本信息进行一下配置:
1
2
3
4
5
6
7
8
9
10
11
12
13
14
15
16
17
18
19
20
| import io.swagger.v3.oas.models.OpenAPI;
import io.swagger.v3.oas.models.info.Contact;
import io.swagger.v3.oas.models.info.Info;
import io.swagger.v3.oas.models.info.License;
import org.springframework.context.annotation.Bean;
import org.springframework.context.annotation.Configuration;
@Configuration
public class OpenAPIConfig {
@Bean
public OpenAPI openAPI() {
return new OpenAPI()
.info(new Info()
.title("接口文档的标题")
.description("接口文档的介绍")
.version("接口文档的版本 V1")
.license(new License().name("接口文档的许可协议 License").url("https://zunhuier.top"))
.contact(new Contact().name("联系人 zunhuier").email("联系人邮箱")));
}
}
|
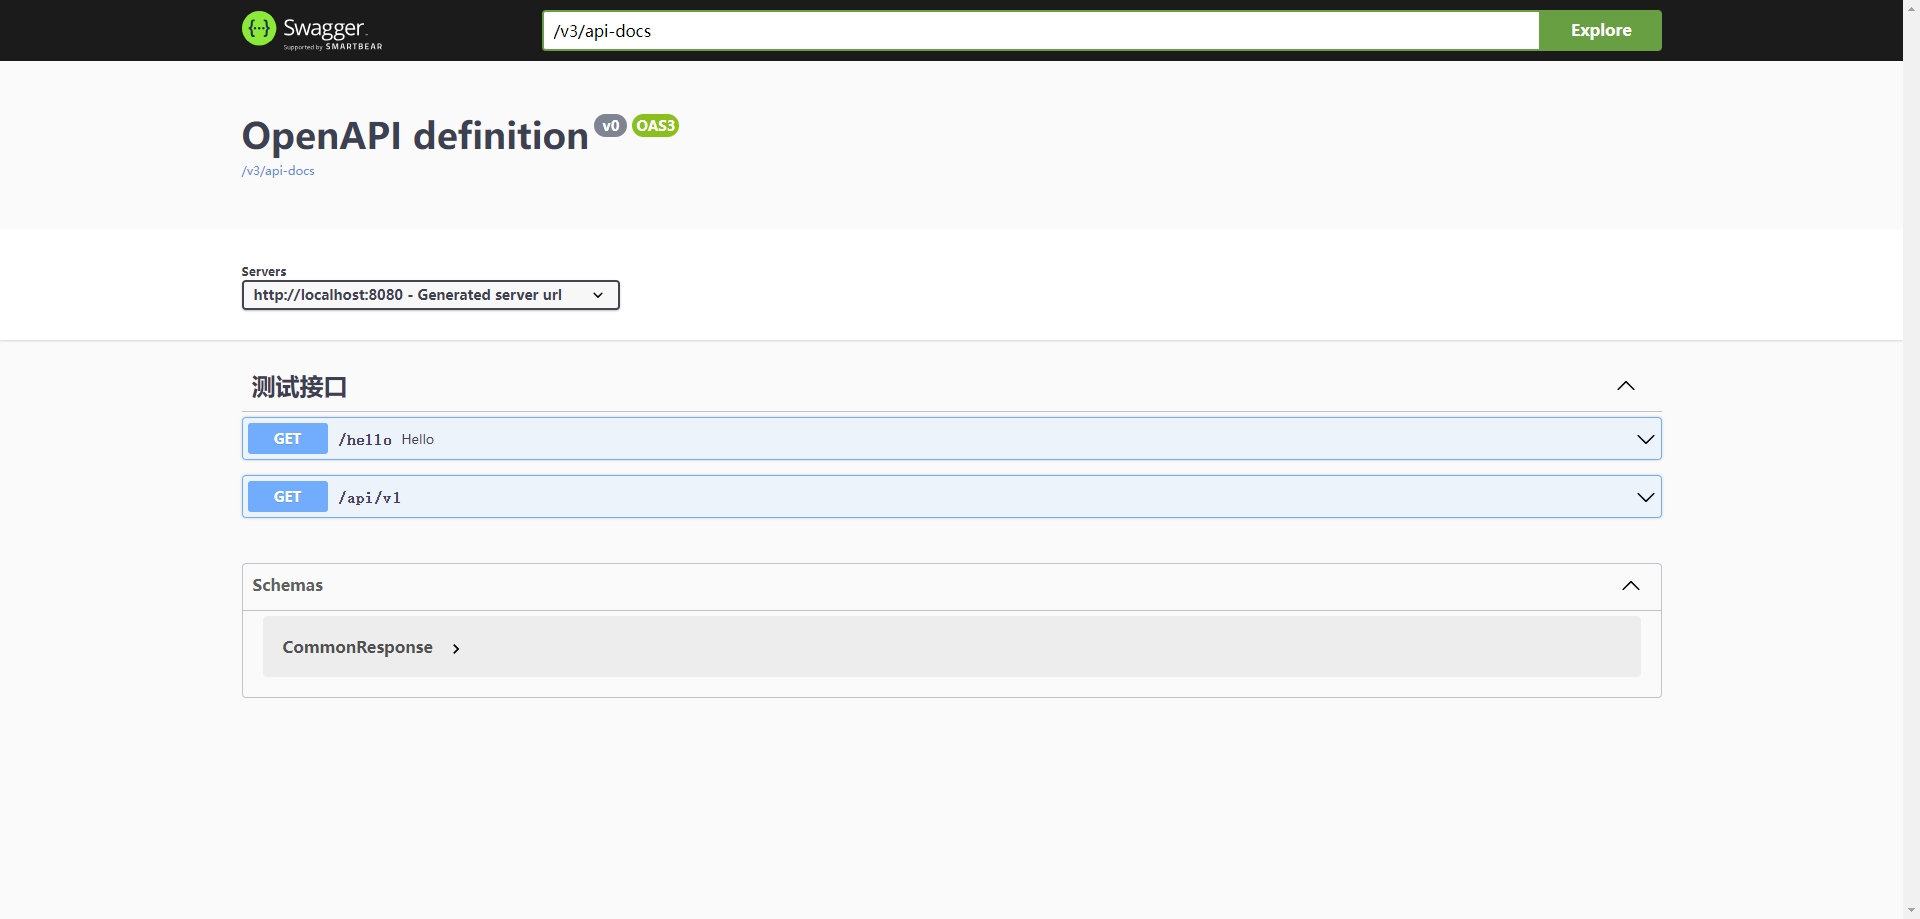
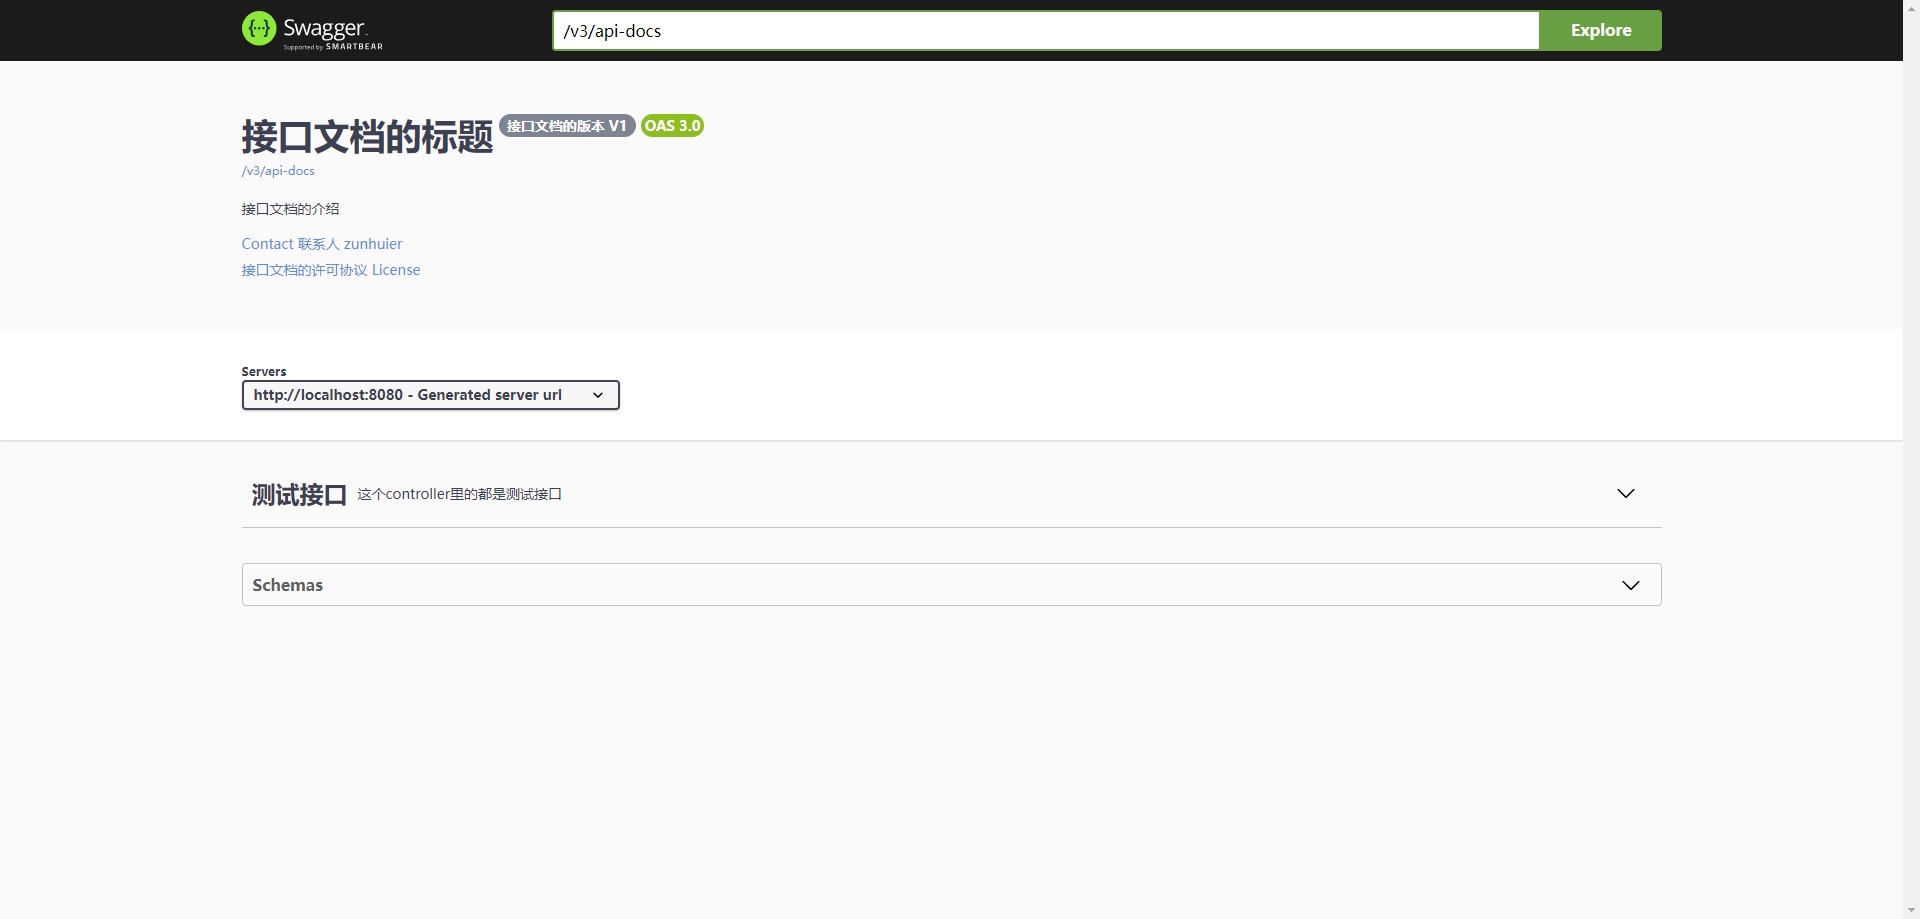
在SwaggerUI中效果如图所示:
最后,就是使用OpenAPI规范的注解,来注释各个Restful接口了,下面介绍这些注解的作用。
注解
@Tag
这个注解作用于类上,也可以标记到方法上,起一个标记的作用。一般加在Controller类上,表示这个Controller下的所有接口是某一类的接口,被归类到同一标记下,可以起到接口分组的作用。
1
2
3
4
5
6
7
8
| import org.springframework.web.bind.annotation.*;
import io.swagger.v3.oas.annotations.tags.Tag;
@RestController
@Tag(name = "测试接口", description = "这个controller里的都是测试接口")
public class TestController {
}
|
@Operation
一般加在接口方法上,表示这是一个操作,用来对接口进行详细的描述。后面讲的@Parameters、@ApiResponses注解的作用其实都可以直接用@Operation注解中的属性来说明实现,一个注解就能干很多事。
1
2
3
4
5
6
7
8
9
10
11
12
13
14
15
16
17
| import org.springframework.web.bind.annotation.*;
import io.swagger.v3.oas.annotations.tags.Tag;
import io.swagger.v3.oas.annotations.Operation;
@RestController
@Tag(name = "测试接口", description = "这个controller里的都是测试接口")
public class TestController {
@Operation(summary = "修改用户信息", description = "上传用户id和用户信息")
@PutMapping("/api/user/{id}")
public CommonResponse<User> user(@RequestBody User user, @PathVariable("id") int id) {
System.out.println(user);
return CommonResponse.result(ResultEnum.SUCCESS, user);
}
}
|
@Parameters和@Parameter
这两个注解用于描述接口中的显式参数,显式参数是指header、query、path、cookie上的参数,不是请求体中的参数,请求体有专门的注解说明。@Parameters中可以有多个@Parameter。
1
2
3
4
5
6
7
8
9
10
11
12
13
14
15
16
17
18
19
20
21
22
23
| import org.springframework.web.bind.annotation.*;
import io.swagger.v3.oas.annotations.tags.Tag;
import io.swagger.v3.oas.annotations.Operation;
import io.swagger.v3.oas.annotations.Parameter;
import io.swagger.v3.oas.annotations.Parameters;
import io.swagger.v3.oas.annotations.enums.ParameterIn;
@RestController
@Tag(name = "测试接口", description = "这个controller里的都是测试接口")
public class TestController {
@Operation(summary = "修改用户id", description = "上传用户id和用户信息")
@Parameters({
@Parameter(name = "id", description = "要修改的用户id", in = ParameterIn.PATH, example = "123")
})
@PutMapping("/api/user/{id}")
public CommonResponse<User> user(@RequestBody User user, @PathVariable("id") int id) {
System.out.println(user);
return CommonResponse.result(ResultEnum.SUCCESS, user);
}
}
|
springdoc会自动扫描接口方法中的参数,推断参数的数据类型,以及根据@PathVariable注解判断出是path上的参数。如果要手动给接口方法中的参数添加描述,那@Parameter注解的name属性要设置成跟方法参数名一样。注意,name属性始终表示的是HTTP请求中的参数名。
@RequestBody
这个注解用来描述请求体中的内容,比如Content-Type是multipart/form-data、application/x-www-form-urlencoded或者application/xml等等类型的请求,还有可能是上传文件之类的请求,这类请求中的请求体内容可以通过这个注解来定义,关键是注解的content属性。
1
2
3
4
5
6
7
8
9
| @PostMapping("/api/hello")
@Operation(summary = "Hello", description = "回复Hello")
@io.swagger.v3.oas.annotations.parameters.RequestBody(
content = @Content(mediaType = MediaType.MULTIPART_FORM_DATA_VALUE,
schema = @Schema(implementation = User.class))
)
public CommonResponse<String> hello(User user) {
return CommonResponse.result(ResultEnum.SUCCESS, "hello");
}
|
上面例子的接口方法中用一个实体类来接收参数,默认springdoc会把它解析为query上的参数,形如/api/hello?username=xxx&birthday=xxx,而POST请求一般参数是在请求体中的,所以可以通过@RequestBody注解来指明将User类中的属性解析为表单中的字段,以multipart/form-data的格式来传递参数。
注意,SpringMVC也有个@RequestBody注解,两者的包名不同,SpringMVC的@RequestBody注解可以加在接口方法的参数前面,表示请求参数是在请求体中以json的格式进行传递,springdoc会自动解析出来。
@ApiResponses和@ApiResponse
这两个注解用于描述接口的响应内容,默认情况下,springdoc会根据接口方法的返回值自动推断出要返回什么类型的数据。如果想要自定义响应内容,就可以使用这两个注解,@ApiResponses中可以有多个@ApiResponse。
1
2
3
4
5
6
7
8
9
10
11
12
13
14
15
16
17
18
19
20
21
22
23
24
25
26
27
28
29
| import org.springframework.web.bind.annotation.*;
import io.swagger.v3.oas.annotations.tags.Tag;
import io.swagger.v3.oas.annotations.Operation;
import io.swagger.v3.oas.annotations.Parameter;
import io.swagger.v3.oas.annotations.Parameters;
import io.swagger.v3.oas.annotations.enums.ParameterIn;
import io.swagger.v3.oas.annotations.responses.ApiResponse;
import io.swagger.v3.oas.annotations.responses.ApiResponses;
@RestController
@Tag(name = "测试接口", description = "这个controller里的都是测试接口")
public class TestController {
@Operation(summary = "修改用户id", description = "上传用户id和用户信息")
@Parameters({
@Parameter(name = "id", description = "要修改的用户id", in = ParameterIn.PATH, example = "123")
})
@ApiResponses({
@ApiResponse(responseCode = "200", description = "成功,返回用户信息"),
@ApiResponse(responseCode = "400", description = "请求错误", content = @Content)
})
@PutMapping("/api/user/{id}")
public CommonResponse<User> user(@RequestBody User user, @PathVariable("id") int id) {
System.out.println(user);
return CommonResponse.result(ResultEnum.SUCCESS, user);
}
}
|
@Schema
这个注解用于描述数据模型,一般加在实体类和实体类中的属性上,用于springdoc解析数据,比如上面那些例子中的CommonResponse和User类:
1
2
3
4
5
6
7
8
9
10
11
12
13
14
15
16
17
18
19
20
| import com.fasterxml.jackson.annotation.JsonFormat;
import io.swagger.v3.oas.annotations.media.Schema;
import lombok.Data;
import java.util.Date;
@Data
@Schema(description = "用户实体类")
public class User {
private int id;
@Schema(description = "用户名字", example = "zunhuier", requiredMode = Schema.RequiredMode.REQUIRED)
private String username;
@JsonFormat(pattern = "yyyy-MM-dd")
@Schema(description = "用户生日", example = "1996-6-6", format = "date", type = "string")
private Date birthday;
}
|
1
2
3
4
5
6
7
8
9
10
11
12
13
14
15
16
17
18
| import com.paxsz.operation.entity.constant.ResultEnum;
import io.swagger.v3.oas.annotations.media.Schema;
import lombok.Data;
@Data
@Schema(description = "通用的响应体")
public class CommonResponse<T> {
@Schema(description = "响应的状态码")
private int code;
@Schema(description = "响应的消息")
private String message;
@Schema(description = "响应的数据")
private T data;
}
|
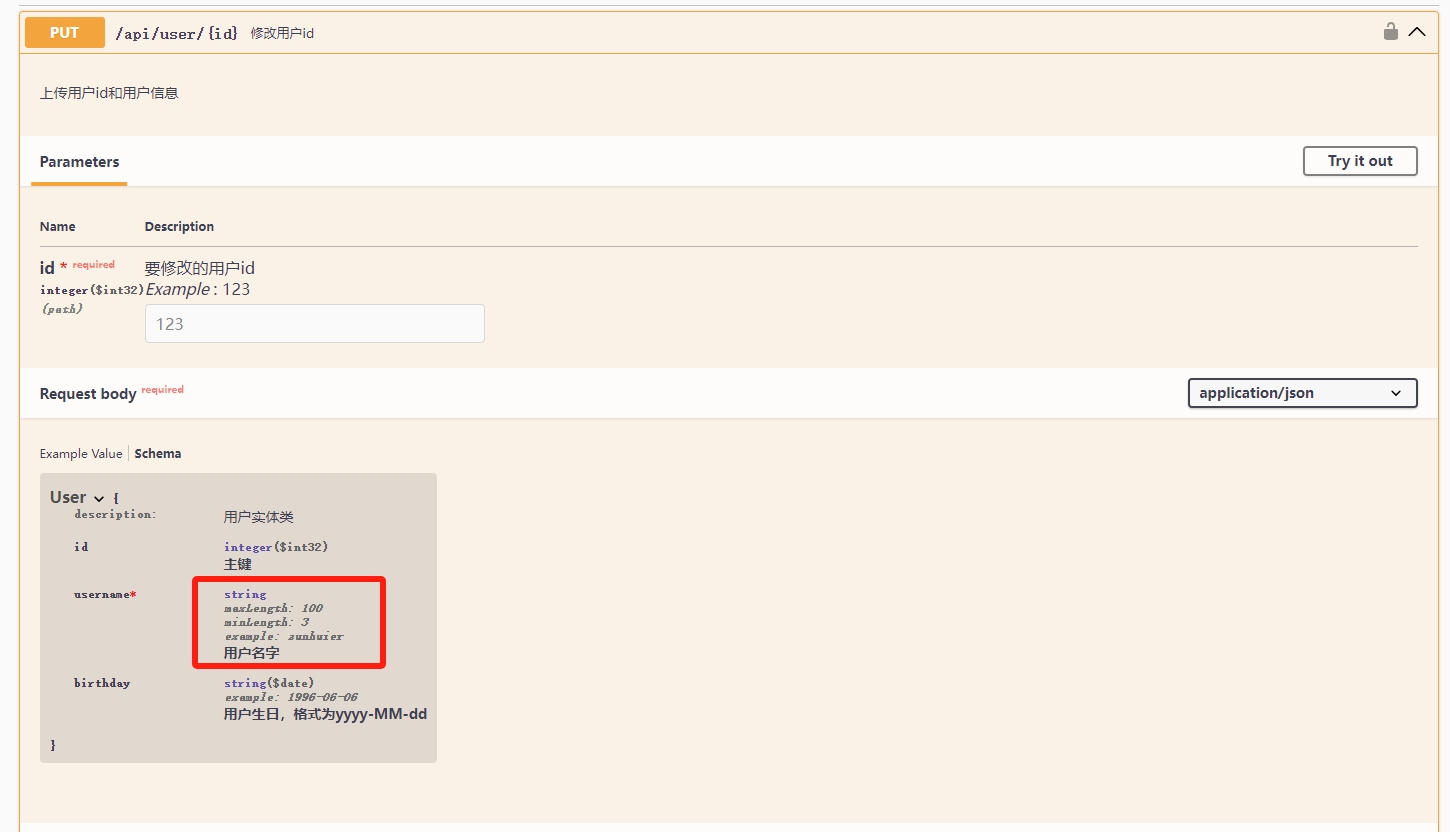
经过springdoc解析后,在OpenAPI中生成的Schema如下:
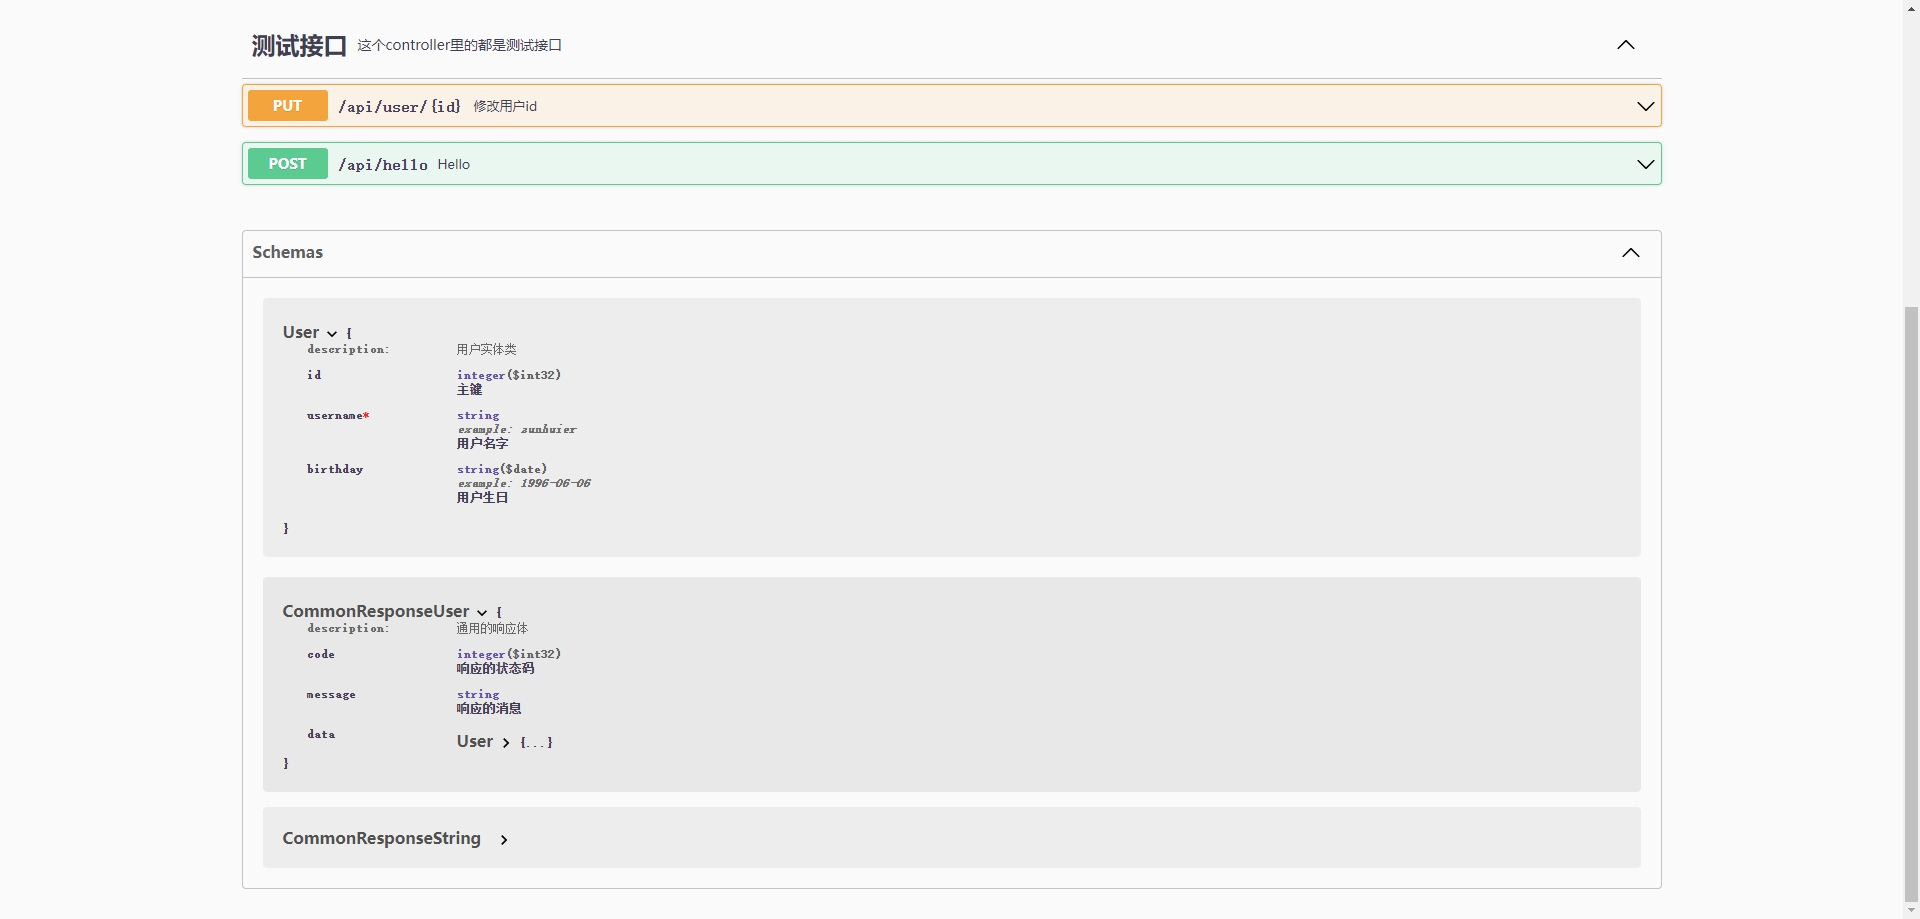
被红星标记的属性说明是必需的。
@Hidden
这个注解可以加在接口方法或者实体类的属性上,用于隐藏接口和不必要返回的属性,比如某个接口还没开发完成,就可以加个@Hidden注解隐藏起来,不显示在接口文档上。
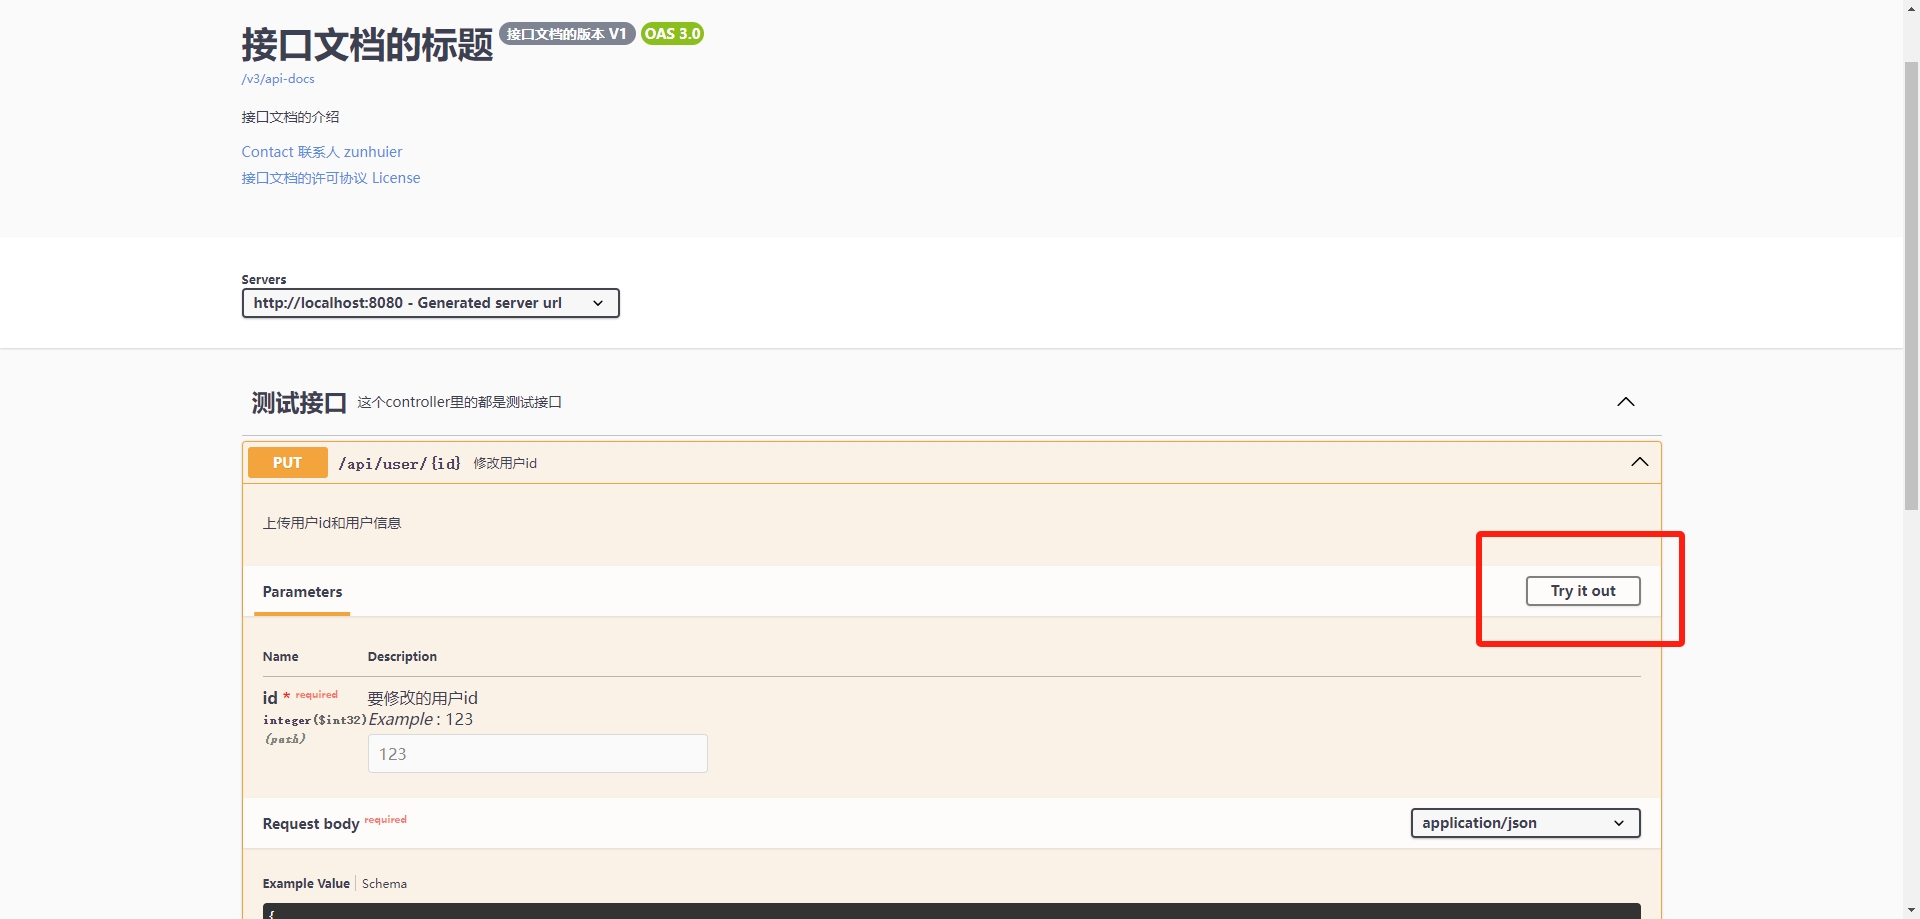
接口调试
Swagger有一个很方便的功能,就是可以直接在接口文档页面上进行调试,类似Postman,只需要点击接口旁边的Try it out按钮即可打开调试页面,填好参数后即可发送请求进行调试:
权限验证
通常接口都会有权限验证,比如要携带token啥的,那接口调试怎么办?OpenAPI和Swagger提供了解决办法。
首先在OpenAPI的配置类中定义SecurityScheme,然后通过GlobalOpenApiCustomizer给每个接口加上需要进行权限验证的Security OpenAPI属性:
1
2
3
4
5
6
7
8
9
10
11
12
13
14
15
16
17
18
19
20
21
22
23
24
25
26
27
28
29
30
31
32
33
34
| @Configuration
public class OpenAPIConfig {
@Bean
public OpenAPI openAPI() {
return new OpenAPI()
.info(new Info()
.title("接口文档的标题")
.description("接口文档的介绍")
.version("接口文档的版本 V1")
.license(new License().name("接口文档的许可协议 License").url("https://zunhuier.top"))
.contact(new Contact().name("联系人 zunhuier").email("联系人邮箱")));
.components(new Components().addSecuritySchemes("Token", new SecurityScheme()
.type(SecurityScheme.Type.APIKEY)
.in(SecurityScheme.In.HEADER)
.name("Authorization")));
}
@Bean
public GlobalOpenApiCustomizer globalOpenApiCustomizer() {
return openApi -> {
if (openApi.getPaths() != null) {
openApi.getPaths().forEach((path, pathItem) -> {
pathItem.readOperations().forEach(operation -> {
operation.addSecurityItem(new SecurityRequirement().addList("Token"));
});
});
}
};
}
}
|
上面的配置表示,每次请求都需要在请求头中携带Authorization标头的api key。SecurityScheme.Type还有其它支持的验证方法,比如http basic认证,http bearer认证,oauth2认证等等。
如果不是所有接口都需要验证,可以在globalOpenApiCustomizer方法的代码中,对path进行判断,排除掉某些接口。或者麻烦点,不全局添加,而是在每个需要的接口方法或者Controller类上添加@SecurityRequirement注解:
1
2
3
4
| @SecurityRequirement(name = "Token")
public CommonResponse<String> hello(User user, int abc) {
return CommonResponse.result(ResultEnum.SUCCESS, "hello");
}
|
配置完成后,接口文档上的效果如图所示:
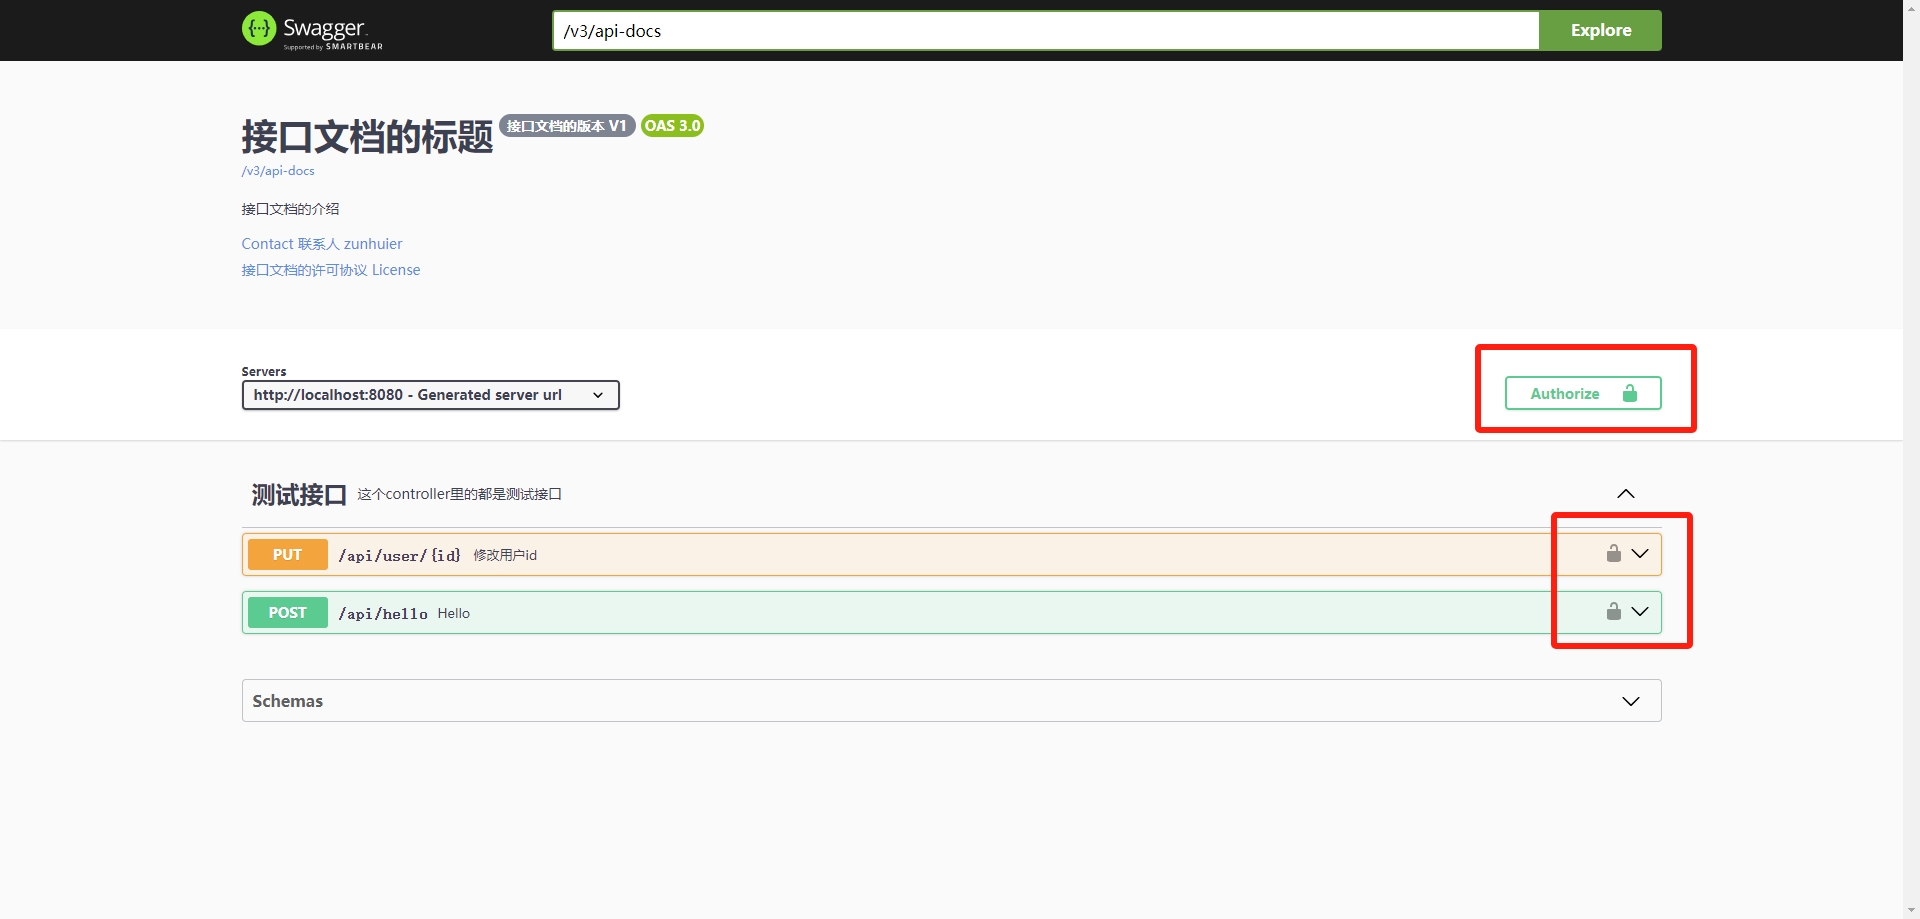
页面上就会多了小锁的图标,最上面的绿色那个是全局验证,接口旁边的灰色小锁是每个接口单独的验证,点击图标就可以添加验证了,比如输入token。
JSR-303规范注解
一般我们需要对请求参数进行校验,常用的是JSR-303规范下的一套Bean Validation注解,比如:
1
2
3
4
5
6
7
8
9
10
11
12
13
14
15
16
17
18
19
20
21
22
23
| import com.fasterxml.jackson.annotation.JsonFormat;
import io.swagger.v3.oas.annotations.media.Schema;
import lombok.Data;
import javax.validation.constraints.Size;
import java.util.Date;
@Data
@Schema(description = "用户实体类")
public class User {
@Schema(description = "主键")
private int id;
@Schema(description = "用户名字", example = "zunhuier", requiredMode = Schema.RequiredMode.REQUIRED)
@Size(min = 3, max = 100)
private String username;
@JsonFormat(pattern = "yyyy-MM-dd")
@Schema(description = "用户生日", example = "1996-6-6", format = "date", type = "string")
private Date birthday;
}
|
1
2
3
4
5
6
7
| import org.springframework.validation.annotation.Validated;
public CommonResponse<User> user(@Validated @RequestBody User user, @PathVariable("id") int id) {
return CommonResponse.result(ResultEnum.SUCCESS, user);
}
|
类似的注解还有@Min、@Max、@NotNull和@NotBlank等等,springdoc会自动检测到这些校验注解,并解析到接口文档上:
总结
springdoc的官方文档对如何使用这些注解解释的比较少,不够全面,造成了可能接口文档上的内容跟自己预期的不太一样,需要多查看OpenAPI的规范文档,来了解OpenAPI中具体有哪些属性,跟注解中的属性对不对得上,是否可以用来输出自己想要的自定义内容。
 微信
微信 支付宝
支付宝